
Fronius Inverter: Initial Wi-Fi Setup / Connection / Reconnection Guide
Fronius Inverter: Initial Wi-Fi Setup / Connection / Reconnection Guide
If you’ve recently installed a Fronius solar inverter (or need to reconnect your wifi), you’re probably eager to connect it to Wi-Fi and start monitoring your solar system’s performance.
This guide for Fronius SnapINverters will walk you through the process step by step (or access a downloadable PDF here).
You will need a smartphone or tablet and your home or business wi-fi connection logins.
1. Register At Solarweb.com
Fronius inverters are monitored via a website called solarweb.com.
To start with you will need to register an account with solarweb.com.
If you haven’t got an account already, sign up for an account here and be sure to confirm your email with the confirmation email they will send you.
2. Download the Fronius Solar Web App
On smartphone or tablet download the Fronius Solar Web App called Solar.start:


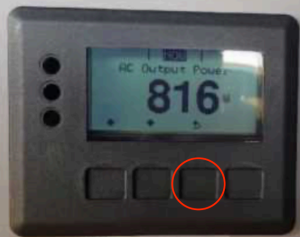
3. Locate the Inverter Screen
Your Fronius Solar Inverter comes with a built-in screen that displays essential information. This screen will be your primary interface for the Wi-Fi setup process – tap the third button to scroll through the options.
4. Accessing the Wi-Fi Settings
- Navigate to the setup menu on the inverter screen. This might require you to scroll through a few menu options.
- Once you’re found the setup menu, push the fourth button on the right to select it.

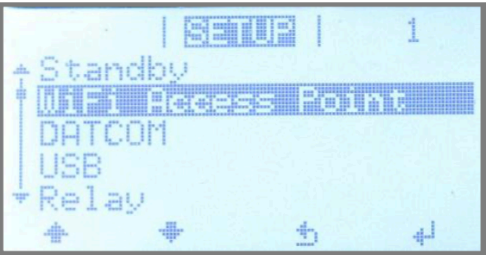
5. Activate the Wi-Fi Access Point
- Scroll through the list of Setup options until you find “WiFi Access Point” and select this menu with the fourth button.
- Activate the Inverters Wi-Fi Access point by hitting the fourth button.
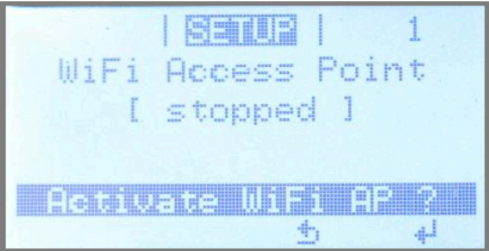
- Your Wi-Fi access point will now be setup on the inverter. Write down or take a photo of this number as you will need it at the end of this process:

6. Connect to the Inverter
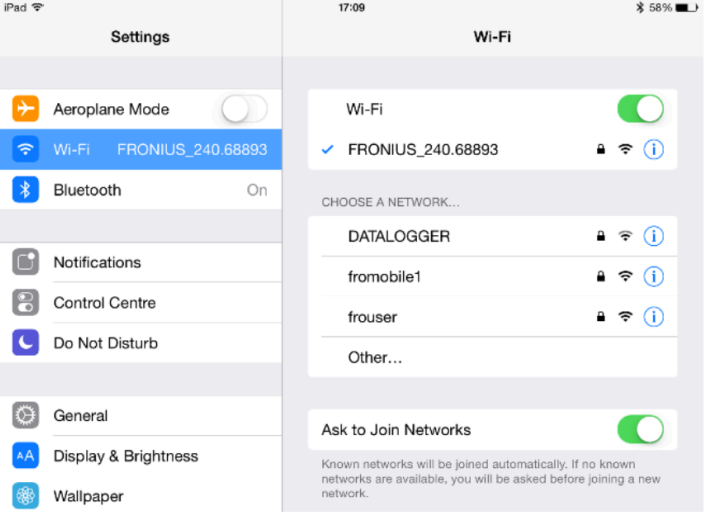
- Once you’ve enabled the Wi-Fi access point on the inverter, you now need to connect a device to it.
- Connect any smart device (Smartphone or Tablet) to the Wi-Fi network of the inverter – just like you would when you connect to the internet on your phone.
- Search for the network with the name “Fronius_240.xxxxx” (the number you noted down earlier) on your device.
- Enter the WiFi password 12345678
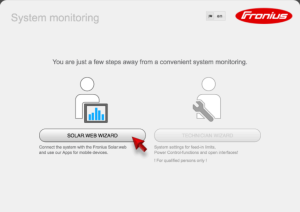
7. Open the Solar Start app & run the Solar Web Wizard
On your device which is now connected to the inverter – open the solar app you downloaded earlier and select “Start Up Wizard”.
Or open a browser on your device and go to the website “192.168.250.181”.
Click to start the Solar Web Wizard.
8. Follow The Instructions
- Enter the correct date and time
- Select the right time zone
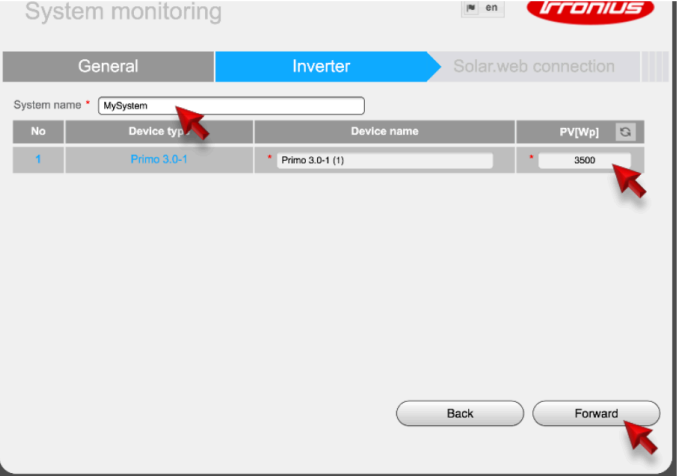
- Type in your system name (you can name it whatever you want)
- Type in your solar feed-in tariff which you can find on your energy bill or electricity retailers website
- Check the device type and in the PV[Wp] field enter the size o your solar system. For a 6.6kw system the figure to enter is 6600, for an 8kw system, enter 8000.
- The next step is connecting the inverter to your Wi-Fi:
- Choose the internet connection type Hard-Wired or Wireless (wireless is the default)
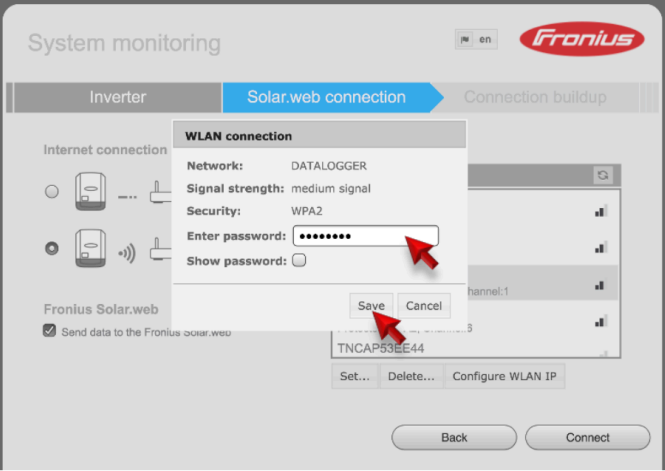
- Select your Wi-Fi network under Available Networks (or if you have a hidden Wi-Fi network use “Add WLAN” option)
- After selecting your network click “Set” and enter the password for the Wi-Fi network and hit Save.
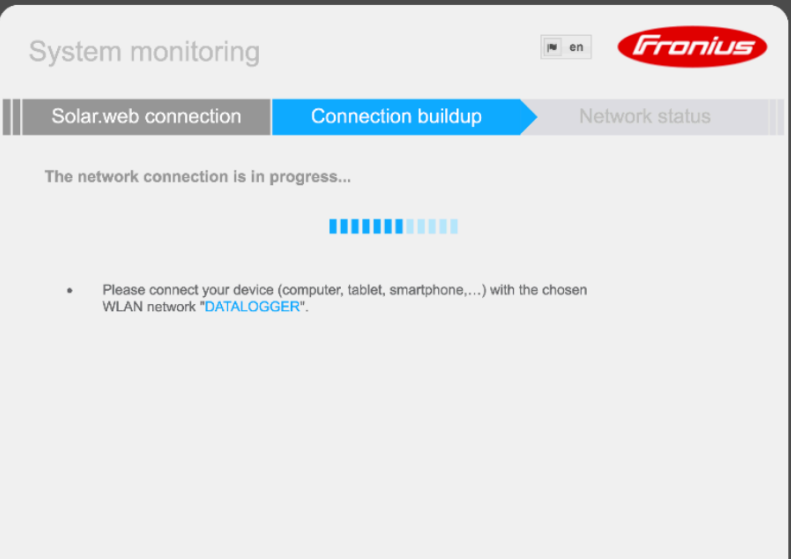
- Lastly click “Connect”

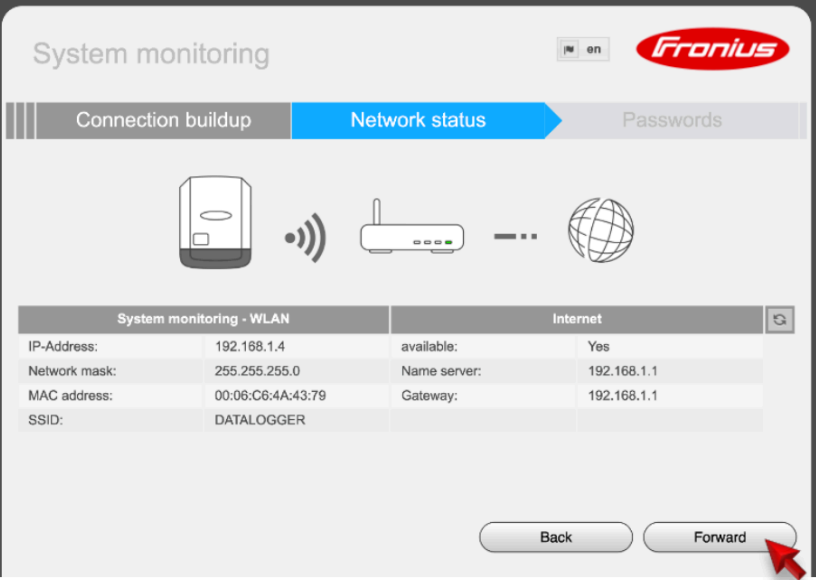
9. Test The Inverter Connection
Close the Solar Web Wizard app or website and disconnect your smart device or tablet from the inverters wifi and reconnect it to your own Wi-Fi and follow the instructions to test the connection and network status.
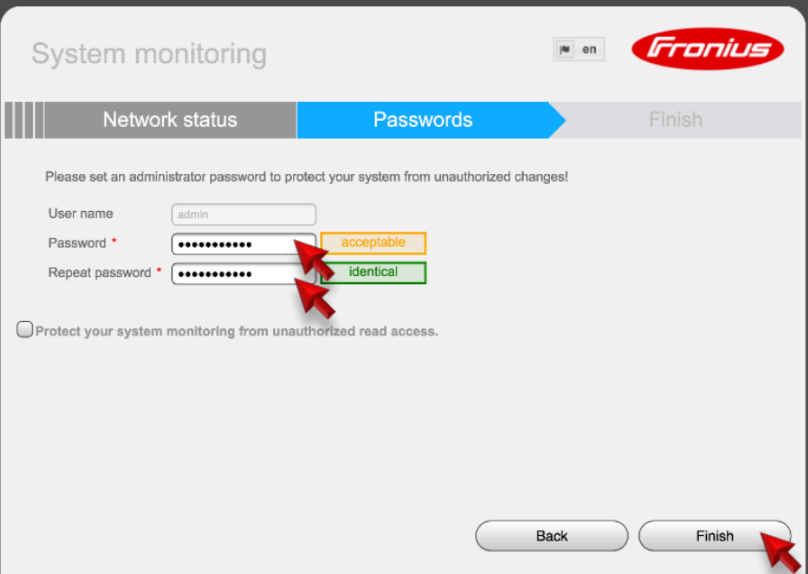
Choose a password for the inverter and click on “Finish”
6. Finalising the Connection
The inverter is now successfully connected to the internet.
The system still needs to be added to a SolarWeb monitoring account.
To do this, provide Arkana Energy with your email address that you signed up to solarweb.com with and the IP address of the inverter (which you noted down earlier). This will allow us to add you to our SolarWeb monitoring account.