
Sungrow WLAN Dongle: Initial Wi-Fi Setup / Connection / Reconnection Guide
Sungrow WLAN Dongle: Initial Wi-Fi Setup / Connection / Reconnection Guide
Connecting (or reconnecting) your Sungrow inverter using the WLAN Dongle to your home Wi-Fi allows you to effortlessly monitor your solar system’s performance. If your dongle has no button on it this is a WLAN dongle. This specific dongle is also easily identifiable by its 3 lights labeled “RUN”, “COM”, and “NET”. Following the correct connection process for the WLAN Dongle ensures you get the most accurate and real-time insights into your solar energy usage.
Note: If your dongle has lights labeled “RUN”, “WLAN”, and “LAN”, you might have the WINET Dongle. For guidance on connecting the WINET Dongle, please refer to our WINET Connection Guide. You can also download this guide as a PDF here.
1. Correct Dongle Check
Does your Inverter dongle look like this?
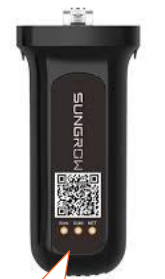
If so, then you’re in the right place.
2. Download the Sungrow iSolarCloud App
On your smartphone or tablet download the Sungrow App called iSolarCloud:


3. Scan the QR Code
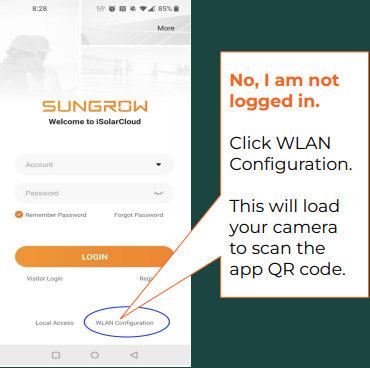
Next, you need to scan the QR code on your inverter dongle. Make sure your phone is connected to your home WiFi then open the iSolarCloud App.
- If you are not logged in to the app, click WLAN configuration on the app homepage.
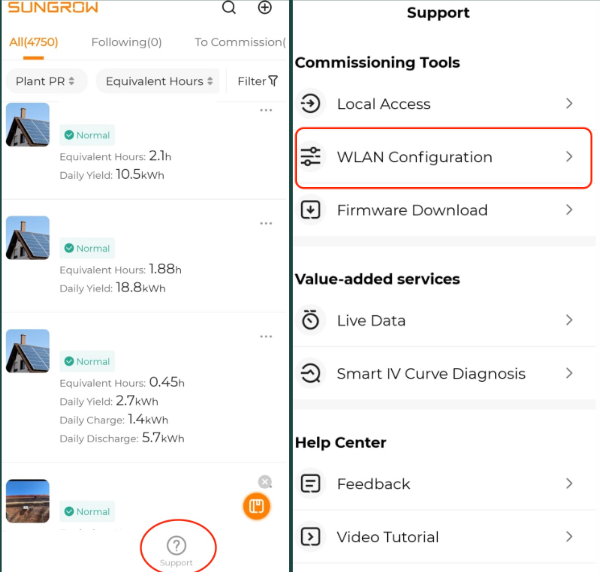
- If you are logged into your app click “Support” down the bottom then click on “WLAN Configuration”
The app will now automatically load your camera to scan the QR code on the Wi-Fi dongle. Your camera may ask for permission to scan. Please allow permission if required. Scan the QR code on the front of the dongle.

Click “Confirm” and then click “Agree”.

4. Connect To Your Inverter
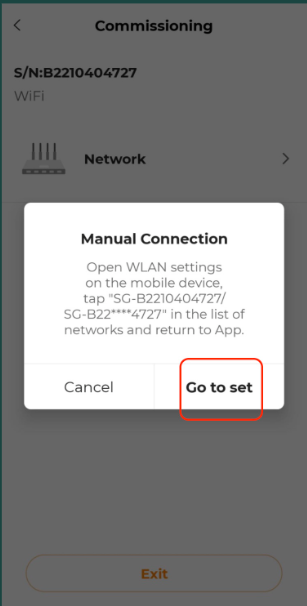
Once you have successfully scanned your QR code you will need to connect your phone/tablet to your inverter.
First click “Go to set” on the “Manual Connection” popup. This will take you to your wifi menu on your device
On the next screen you want to select the Wi-Fi network that begins with SG-XXXX
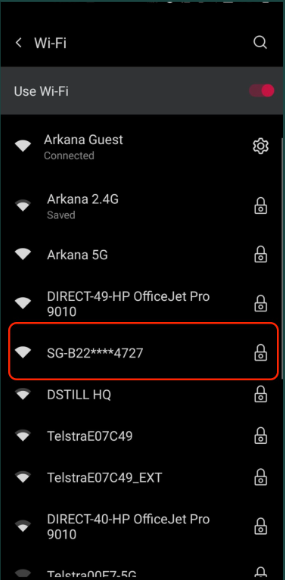
You can match the SG-XXXX network by matching the last 4 digits of the dongle Serial Number to the last 4 digits of the SG-XXXX number.
If you see more than one network with that name, match the SG-XXXX network using the last 4 digits of the dongle Serial Number to the last 4 digits of the SG-XXXX number.
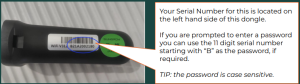
If it asks for a password this is simply the Serial Number located on the left hand side of the dongle starting with “B” and is case sensitive
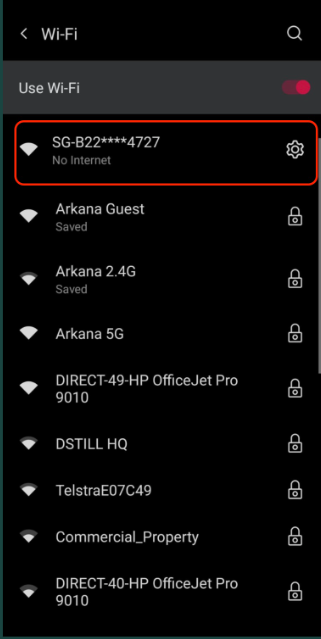
Once connected your phone will show something similar saying “No Internet”. This is normal as we are connecting to the inverter not the internet
5. Connect Your Inverter To Your Home Wifi
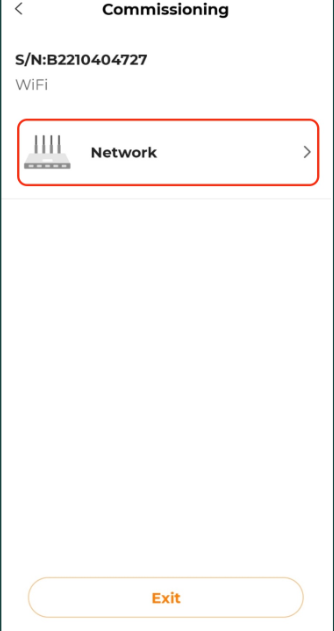
Now connect your inverter to your home wifi.
Click on “Network” to enter your home wifi details.
Here select your home Wi-Fi and enter your wifi password. Please note if you have both 2.4G and 5G Wi-Fi only select the 2.4G as the dongle will not connect to the 5G.
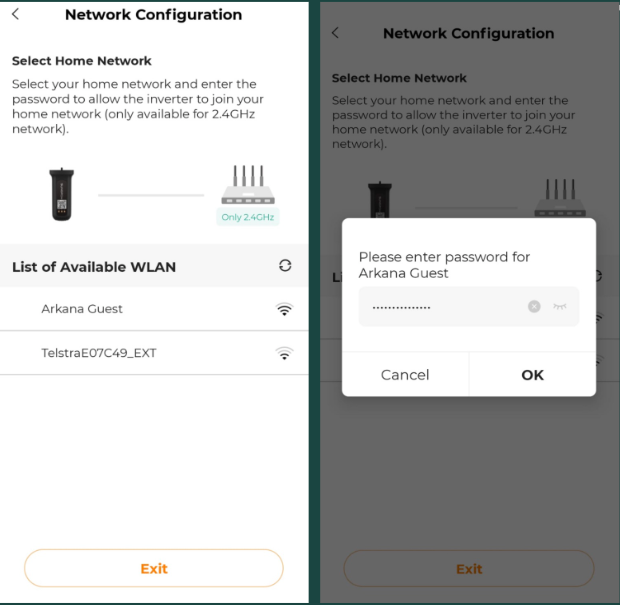
Once you see “Password Setting Successful” you are done and can click “Complete”.
This will then take you to your wifi to connect your device back to your home wifi.

You should now be connected.
6. Troubleshooting
If you get this message it means your phone has connected back to your home Wi-Fi please click “Go to Set” to return to your Wi-Fi settings.
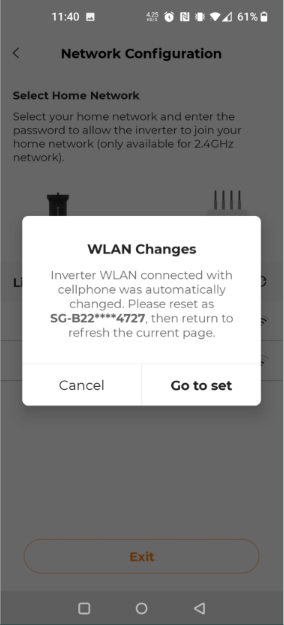
Select the SG-XXXX network again then click “Back” up the top right hand corner to return to the app.
This will then take around 10-15 seconds to refresh the list of available Wi-Fi connections to choose from then follow the previous steps